Do you want to add a PayPal payment form in WordPress?
PayPal makes it really easy to accept global payments on your website. It is secure, cost-effective, convenient and currently has over 400 millions active users worldwide.
In this article, we’ll share how to add a PayPal payment form in your WordPress website step-by-step.
Why Accept PayPal Payments in WordPress?
To accept PayPal payments on your WordPress site, you don’t need a full-fledged online eCommerce store. It will also work if you’re selling only one product or accepting payments for consulting or services. Here, adding a PayPal payments form to your WordPress website can be really prove to be helpful for you.
PayPal is one of the most popular and trusted online payment gateway around the globe. It handles the entire transaction process, so you don’t need to worry about security issues.
Now, let’s know how to add a PayPal payment form in WordPress.
How to Add a PayPal Payment Form in WordPress:
There are many WordPress plugins that let you add a PayPal payment button to your WordPress site. But, according to my personal opinion, in all of these, WPForms is the best option. It is a drag and drop form builder WordPress plugin with over 5 million active installations.
WPForms plugin allows you accept both PayPal and credit cards payments using the same form.
To add a PayPal payment form in your WordPress website, first you’ll need to install and activate the WPForms plugin. Here, you need to purchase the premium version of WPForms WordPress plugin to access the PayPal addons and order form template.
Now, you’ll need to visit the WPForms » Settings page to submit your license key. You can find your license key information in your WPForms dashboard panel.
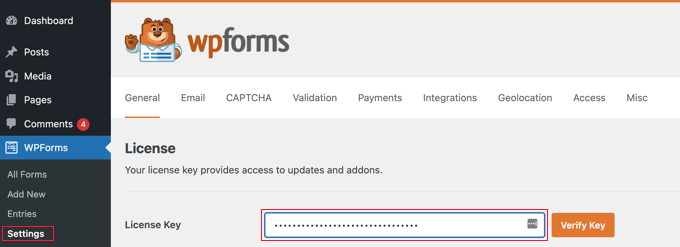
Now, simply click the “Verify Key” button to activate your license.
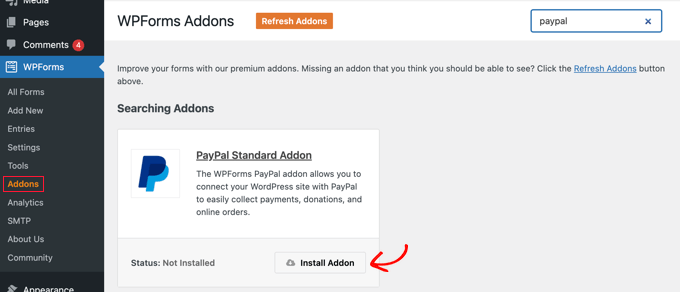
Next, head to the WPForms » Addons page and search for “PayPal” in the search box available in the right side of your WordPress dashboard. Now install “PayPal Standard addon” by simply clicking on the “Install Addon” button.
Now, the PayPal addons will be automatically installed and activated for you.
Now, you have to create your PayPal payment form in WordPress. For this, simply go to the WPForms » Add New page in your WordPress dashboard to launch the form builder.
First, you’ll need to give a title for your PayPal payment form. Now, when you scroll down, you will see an option of the “Billing / Order Form”. Here, you just need to click on the “Use Template” button.
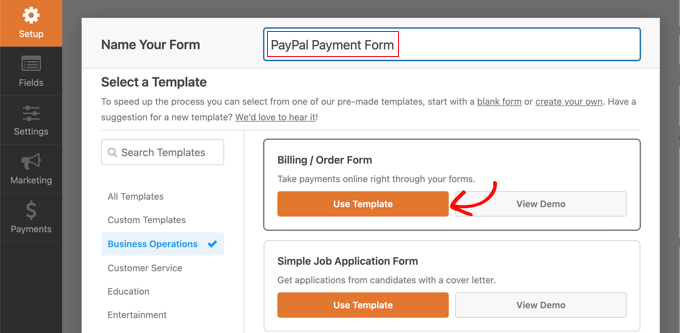
Now, WPForms WordPress plugin will automatically load your payment form template in the drag and drop builder.
Here, you can add, remove or change any field by simply drag and drop the icons.
For instance, as you can see in the below screenshot, multiple items has been added in the “Available Items” section in the payment form so that your customers can select the service or product they wish to pay for.
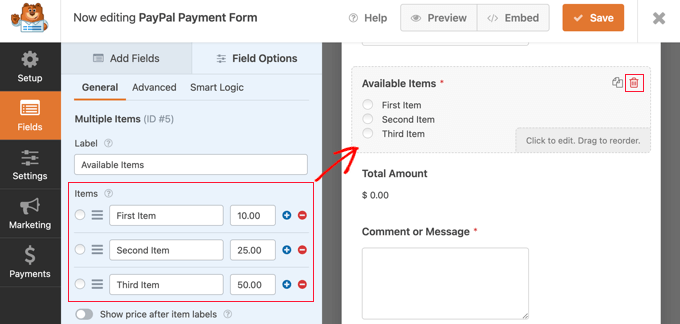
Once you click on this field, it will allows you to customize the field’s label, name and the price of each item.
If you’re offering only a single product or service, then you can delete multiple items by simply clicking the trash icon available in the top right corner of that particular field.
In this case, you can add “Single Item” field by simply dragging it onto your form. (refer the below screenshot)
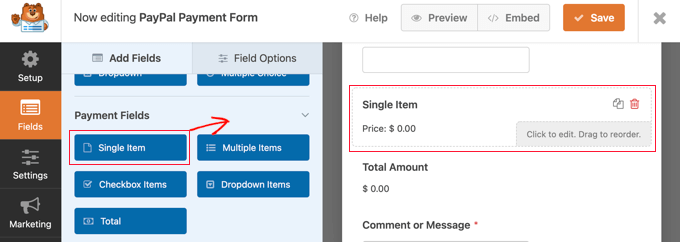
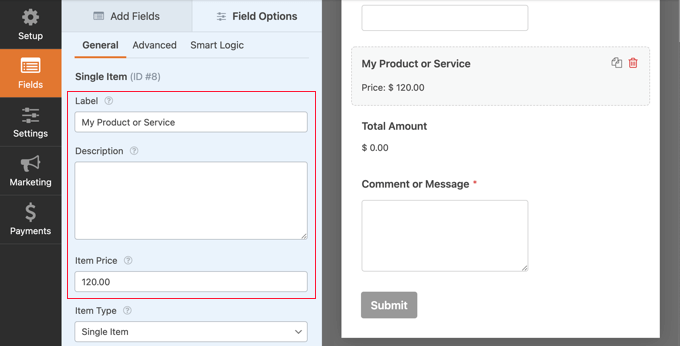
You can click on this field to customize it. Here, you can change the field’s label, description, and item price. If you are only offering a single item, then the “Total Amount” field is useless and you can delete it.
Now, you’ll need to go to the Payments » PayPal Standard to set up the PayPal payment options.
Here, you just need to simply check the “Enable PayPal Standard payments” button as shown in the screenshot below.
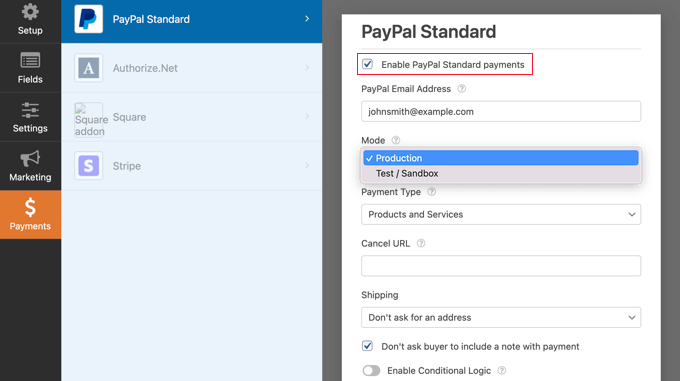
If you already have a PayPal account, then enter your PayPal email address here. If you don’t have a previous one, then you will need to create a PayPal account.
Next, you’ll have to complete other PayPal settings.
If you want to test your PayPal payment form, then you have to select the “Test / Sandbox” option under the “Mode” button. It will help you test whether the payment form is working.
Keep in mind that when you finished testing, then do not forget to change the settings back to the “Production” Mode.
Next, scroll down and select “Products and Services” option under the payment type button. The second option is “Donations”.
Under the “Cancel URL” button, you can also include a URL to redirect your customers who don’t complete the payment and take the plunge whether a shipping address and note are required.
Select the “Enable Conditional Logic” option to accept multiple payment types. Now, click on the “Save” button to store your settings.

Your PayPal payment form is ready. Now, you’ll need to add it to your WordPress website.
For this, just simply create a new post or page, or edit an existing one. Now, click on the plus (+) sign available at the top and add a WPForms block in the WordPress editor.
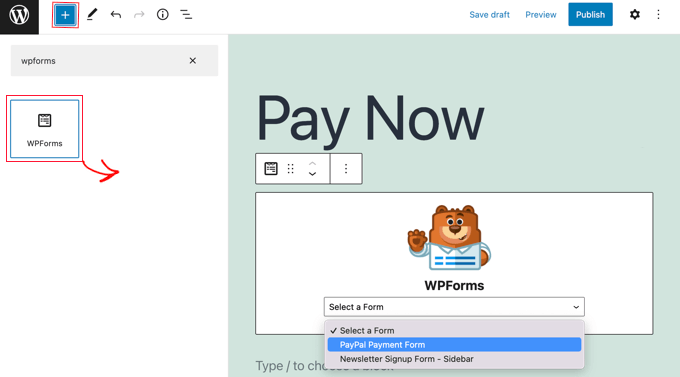
Now, select “PayPal Payment Form” from the dropdown menu as shown in the screenshot below.
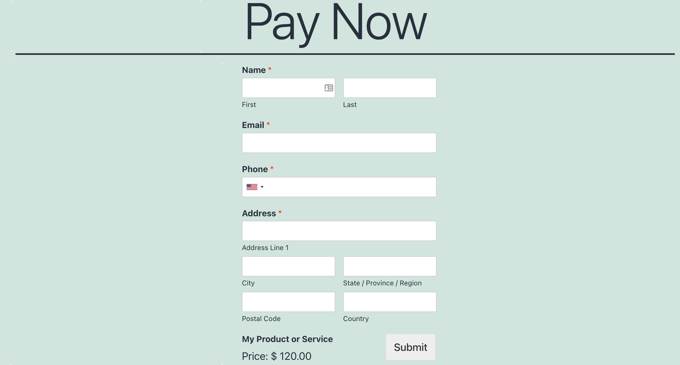
Once you’re finished, click on “Publish” button. Now, go to the page to see your form in action. It will look something like shown in the screenshot below.
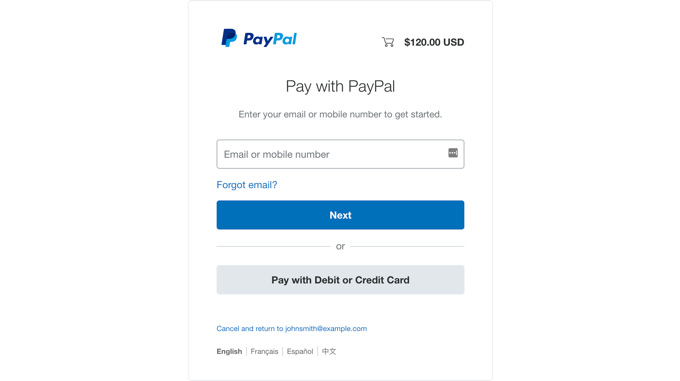
Once your customers fill this form and click the “Submit” button, they will redirect to an another “Pay with PayPal” page so they can finalize the payment.
Take Away
After reading this article, you must understood that how to create and add a PayPal payment form in WordPress. You may also want to learn How to display related posts in WordPress. We hope this article helped you know how to add a PayPal payment form in your WordPress website. If you liked this article, then do not forget to share it with others.

