
Monetizing your content is crucial for sustaining your online presence as a blogger or website owner. Advertisements offer an effective means of generating revenue. To guarantee transparency and uphold the integrity of your ad inventory, you must implement an ads.txt file on your Blogger website. This step-by-step guide will demonstrate how to add an ads.txt file to your Blogger website.
What is an Ads.txt file?
The Interactive Advertising Bureau (IAB) initiated Ads.txt (Authorized Digital Sellers) as an industry standard. Publishers can declare authorized sellers of their ad inventory using it. By adding an ads.txt file to your website, you essentially verify and list the entities authorized to sell ads on your behalf.
How to add the Ads.txt file to your blogger website?
Step 1. To begin, access your Blogger account and go to your dashboard. You can manage and customize your website here.
Step 2. Choose the blog where you wish to add the ads.txt file if you have multiple blogs under one account. To proceed, click on the title of the desired blog.

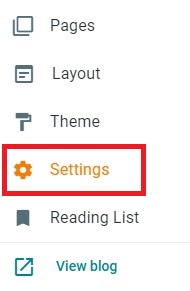
Step 3. Find the option “Settings” in the left-hand menu and actively click on it. Here, you will see plenty of settings options.
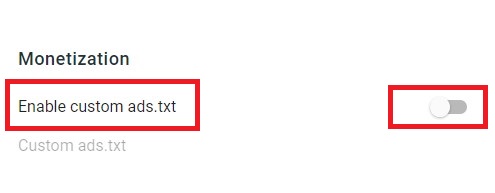
Step 4. Keep scrolling down the page until you locate the section labeled “Monetization”. In this place, you will find an option called “Enable Custom Ads.txt”. When you make it enabled, an option of “Custom ads.txt” will be highlighted. Click on it!
Step 5. The “Custom ads.txt” section contains a text box. Add the content of your ads.txt file here. To sell ads, follow the ad network or platform’s guidelines to create the ads.txt file.
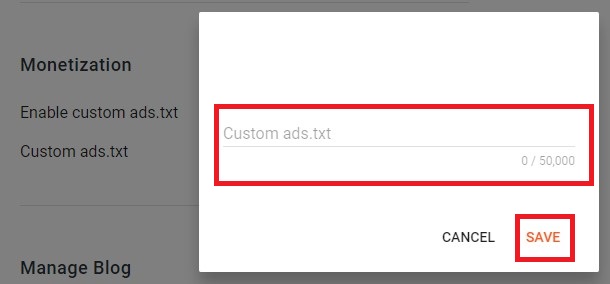
Typically, lines resembling “yourdomain.com, [publisher ID], [type of account], [platform ID]” will compose the content of the ads.txt file. Paste the content into the text box by copying it.
Step 6. Click on the “Save changes” button to save your settings after pasting the ads.txt code into the text box. Yourdomain.com/ads.txt will be automatically generated by Blogger and made accessible.
Step 7. Open a new browser tab and enter your website’s URL followed by “/ads.txt” to successfully verify the addition of the ads.txt file. For example,
www.yourdomain.com/ads.txt
The contents of your ads.txt file should be displayed on the page.
Conclusion
Congratulations! You have successfully added an ads.txt file to your Blogger website by following these simple steps. If you still have any questions or feedback, please ask in the comment box section.