
Want to show related posts on your WordPress site? By adding related posts, you can help your website visitors find new content, decrease your website’s bounce rate, keep them engaged and increase the pageviews. In this article, we will know how to display related posts in WordPress.
Why It’s Important to Show Related Posts in A WordPress Site?
When you start a new WordPress site, your visitors don’t have any issue finding all your content easily. But, when the content on your site grows, then it may be difficult for visitors to find your website’s important posts.
This problem can be shorted out to a great extent by displaying related posts on your website. By doing this, you keep your visitors engaged on your website, display your best content and lowers your bounce rate.
In this article, we will talk about two methods of displaying related articles. You can choose what you prefer.
- Display popular posts using MonsterInsights WordPress plugin
- Display related posts using the YARPP WordPress plugin
Method 1: Display Popular Posts in WordPress Using MonsterInsights Plugin:
It is better to show popular posts rather than showing related posts. It helps you get higher clicks and user engagement. That’s the reason why a lot of publishers prefer showing most popular posts instead of showing related posts.
One of the best and easiest way to show most popular posts in your WordPress site is by using MonsterInsights plugin. MonsterInsights is the most popular WordPress plugin with over 3 million active installations.
With MonsterInsights WordPress plugin, you can start showing your popular blog posts anytime and anywhere on your site using the “Popular Posts” feature.
However, if you want to unlock more features such as popular posts addon, dashboard reports, advanced tracking features and more, then you can go with the MonsterInsights Pro version.
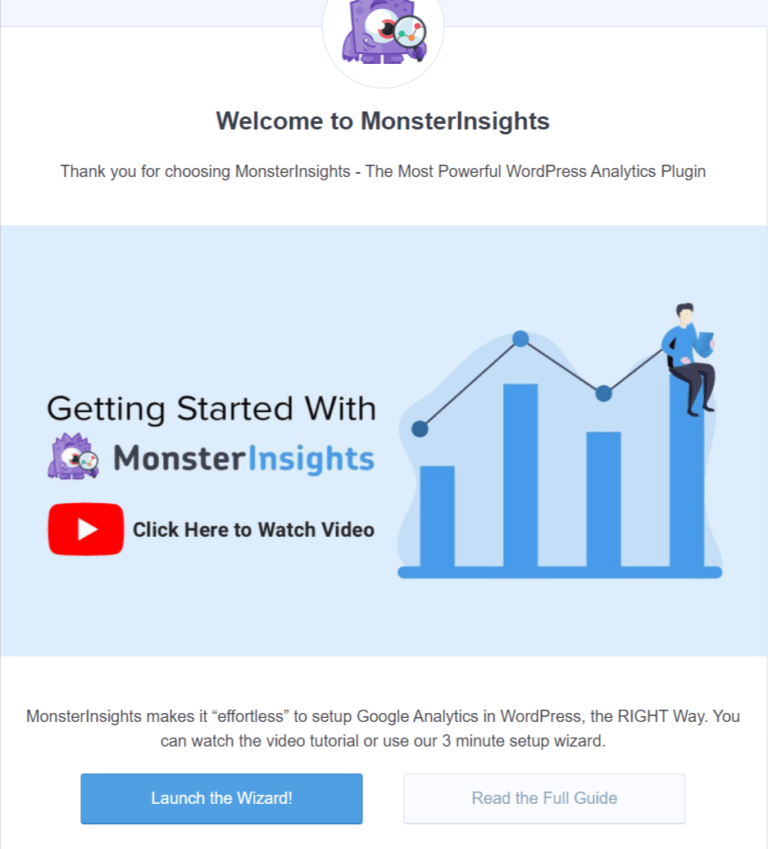
For this, first, you need to install and activate the MonsterInsights plugin.
Once you activate this plugin, an interface something like shown in the screenshot below will be visible to you. Now, you just simply click on the “Launch the Wizard” button to configure the plugin on your WordPress website.
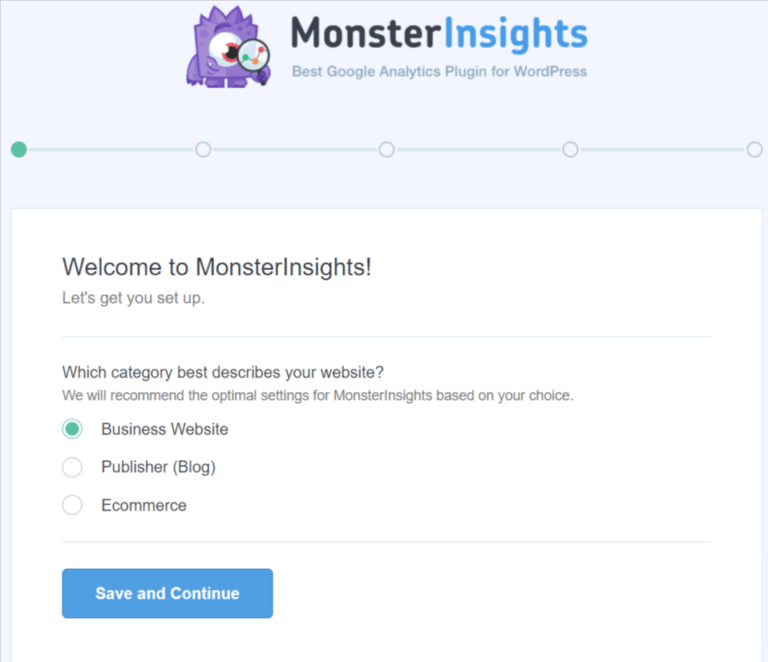
Once you click Launch the Wizard, it will ask you to select your website type if it is business, blogging or ecommerce website. Here; you’ll need to select an option.
Click Save and Continue.
When you proceed further, it will ask you to connect Google Analytics.
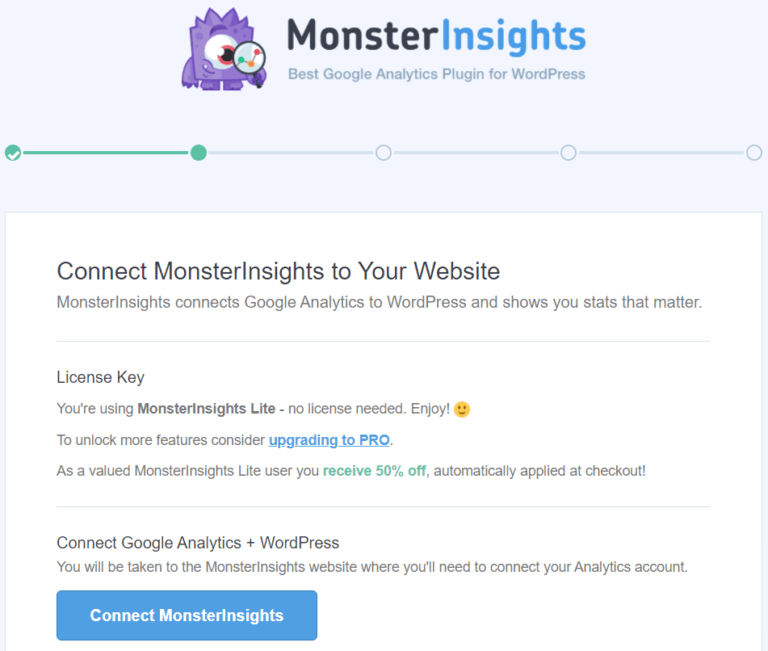
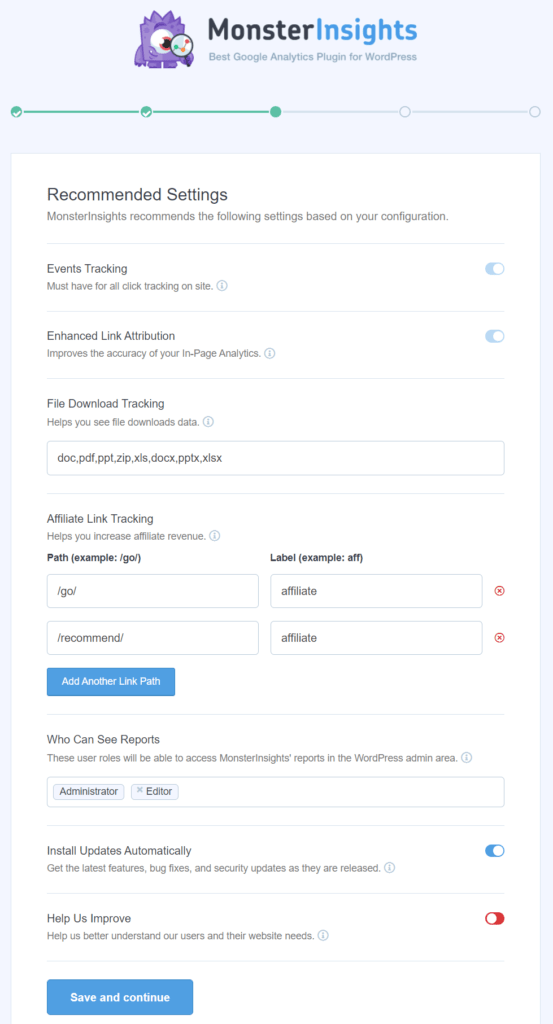
Click on “Connect MonsterInsights”. Once you click this button, it will connect Google Analytics to WordPress. Select your property and click on “Complete Connection” as shown in the screenshot below.
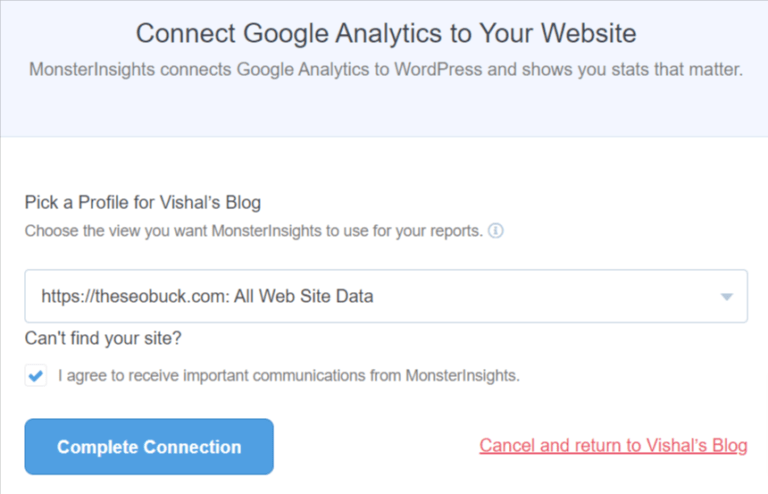
Once you click complete connection, it will redirect you to an another page as shown in the screenshot below. Leave all the settings default and click on “Save and Continue”.
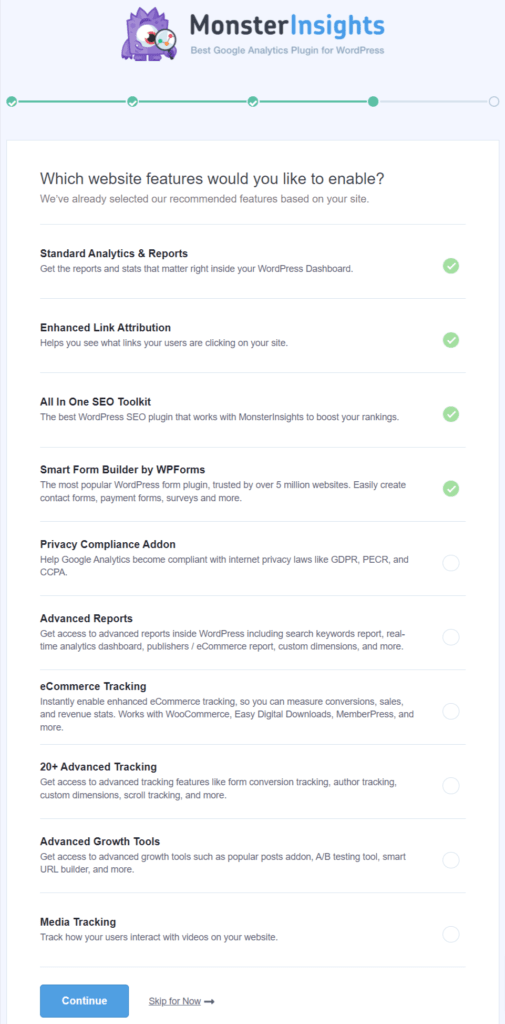
Again, you don’t need to change any setting. Click on “Continue”.
Here; we will proceed with free version. Click on “Complete Setup without Upgrading”. Now, you have successfully completed the MonsterInsights setup wizard.
Now, go to the Insights » Popular Posts from your WordPress dashboard panel. Here, you will see multiple options to display popular posts on your WordPress website.
You can choose “Inline Popular Posts” option to display your articles within the content. In addition, you can also select the ”Popular Posts Widget” to show related posts at the end of your content or in the sidebar.
For this tutorial, we’ll use MonsterInsights plugin’s Popular Posts Widget option and display related posts at the end of the post.
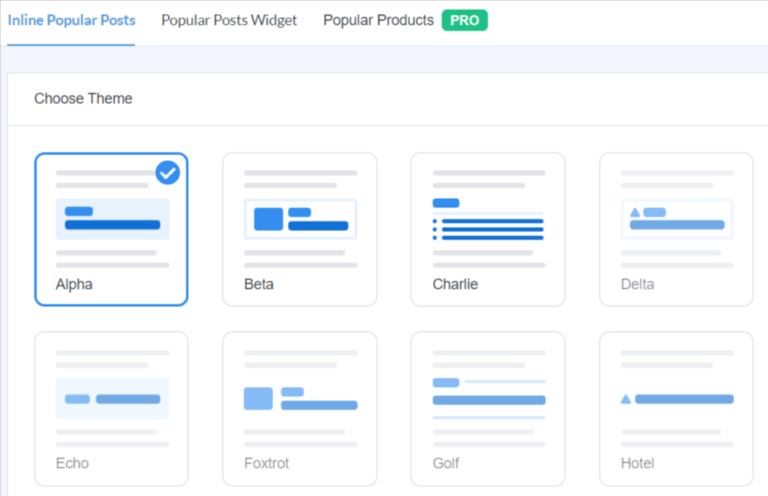
MonsterInsights WordPress plugin offers many pre-built templates for showing related posts. If you upgrade to premium version, you can unlock more attractive themes and design options to display your popular posts.
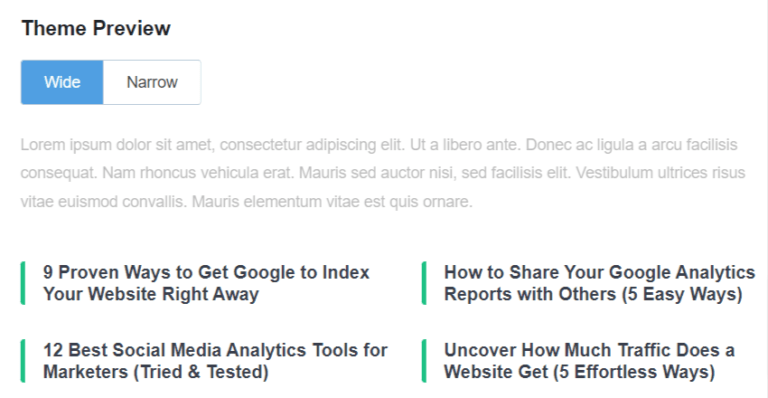
When you choose a theme and scroll down, it will show a preview of your related posts in the ‘Theme Preview’ section as shown in the screenshot below.
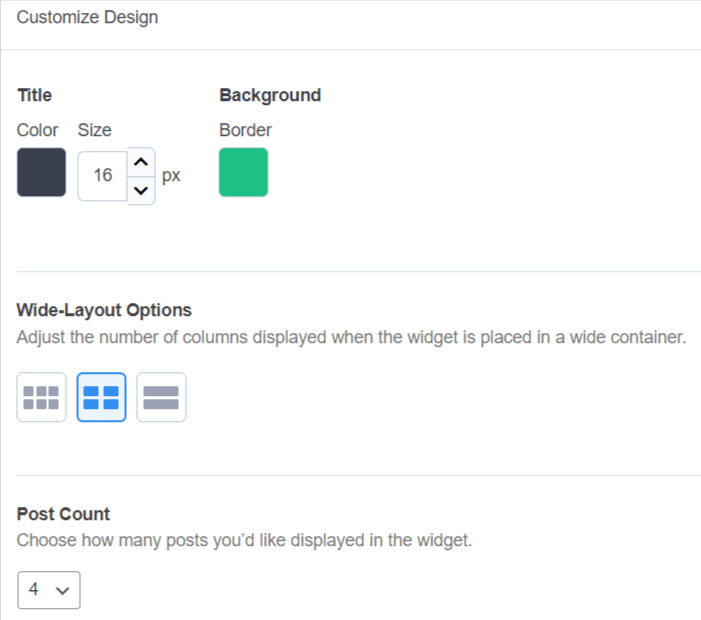
When you go further and scroll down, it will show you options to customize your design. Here; you can change the color and size of the title, background (border) color, change the format of layout, and choose how many posts you want to show in the widget.
When you proceed to next, an option of “Behavior” will be visible where you can change the Widget Styling. Here; you can set default styling or add custom CSS to change the appearance of the popular posts widget.
Once you’ve finished widget styling settings, the next option is to sort your popular posts to display in the related posts widget. It gives you three options to sort your popular posts based on comments, share counts or show a custom list of posts.
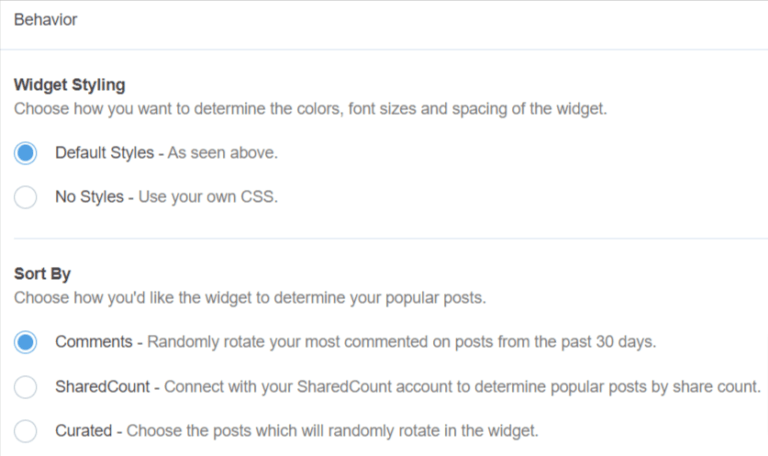
The Comments option allows you to show most commented posts from the past 30 days. Alternatively, you can also choose the second option “SharedCount”, which will show posts with the most share counts. In addition, if you want to show specific posts in the related posts widget, then select the third option — Curated.
If you’re using the premium version of MonsterInsights plugin, then you also get an option to display the top 5 posts automatically from the last 30 days based on the traffic of your website.
When you scroll down, you can see an option to show the widget title. Here; you just need to make the ‘Display Title’ on and enter a title that will appear above your related posts.
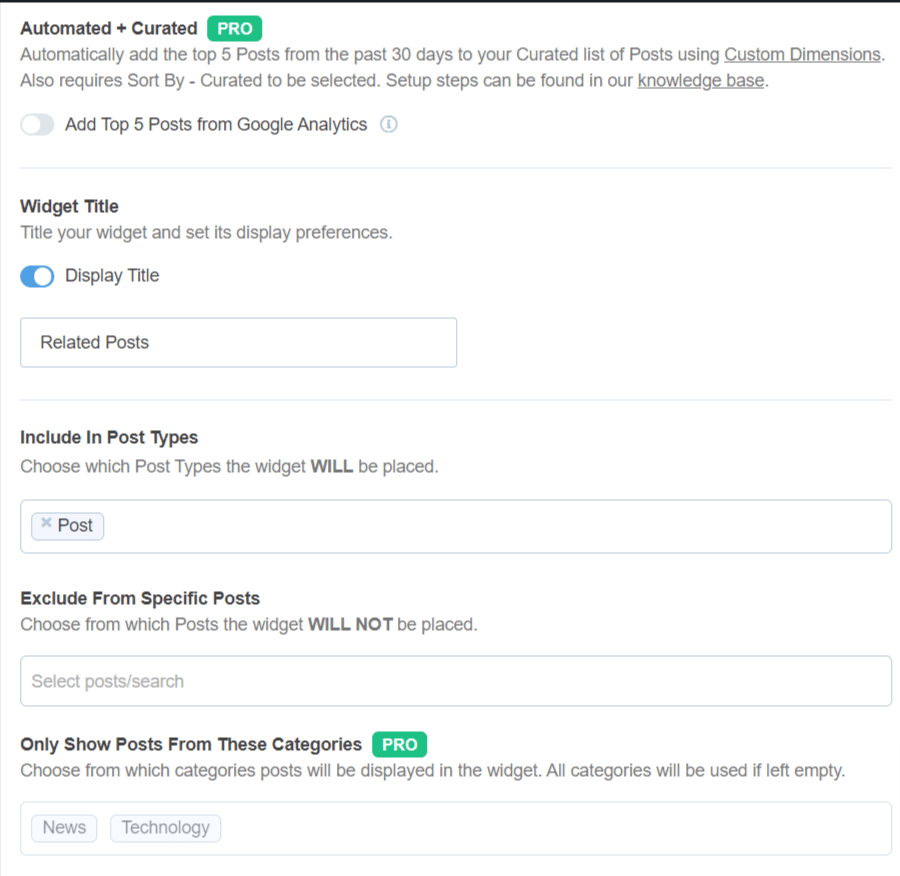
Next, you can choose “Posts” as the post type to include in the related posts widget. Here; you will also see an another option to exclude specific posts from showing in the widget and show posts from particular categories.
Now, you have to choose how to embed your related posts widget in the WordPress website. Here; you can select manual or automatic placement.
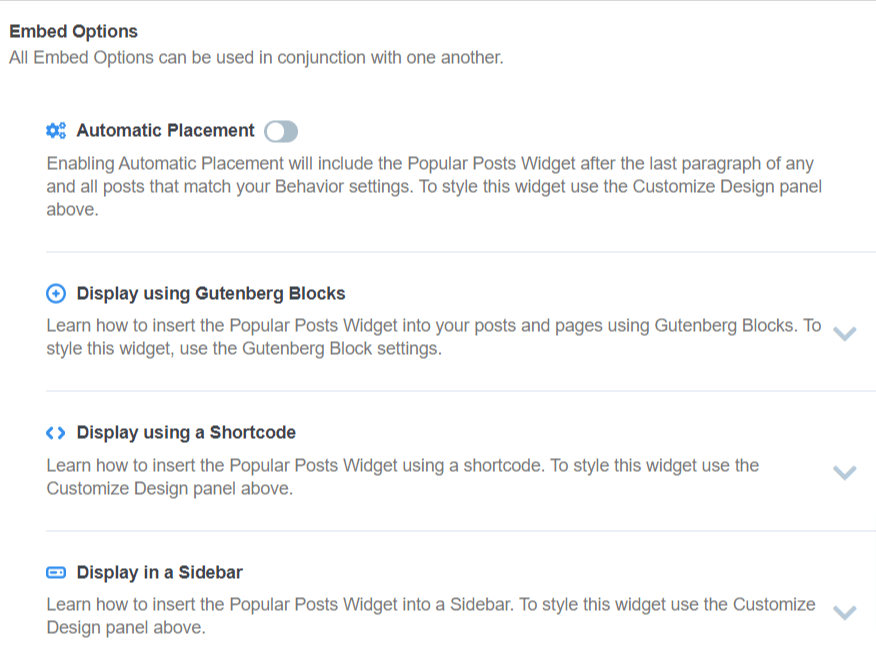
If you select the first option “Automatic Placement”, then the MonsterInsights plugin will display your related posts after the last paragraph of every article or blog post.
Another option is to display your related posts manually on any blog post or page using a shortcode or a “Popular Posts” block.

To do that, simply click the ‘+’ icon and add a “Popular Posts” block where you want it to display in your post or page. The plugin will automatically add your most popular articles and display them as related posts.
Method 2. Display Related Posts using YARPP WordPress Plugin:
If you don’t want to go with MonsterInsights plugin, then you can use the Yet Another Related Post Plugin (YARPP) to show related posts in the WordPress. It’s one of the best popular posts plugins for the WordPress and allows you to display your top blog posts automatically.
Using a customizable algorithm, YARPP calculates a score for every post available on your blog.
Keep in mind that YARPP may slow down your website, especially, if you have a lot of content on your website. For more details, please see our guide on how to speed up your website.
To display your related posts, first, you’ll need to install and activate the Yet Another Related Post Plugin on your website.
Once the plugin is active, you’ll have to go to Settings » YARPP from your WordPress dashboard panel to configure the plugin settings.
Under ‘The Pool’ section settings, you can choose post types to include in the related posts. These include posts, pages and media.
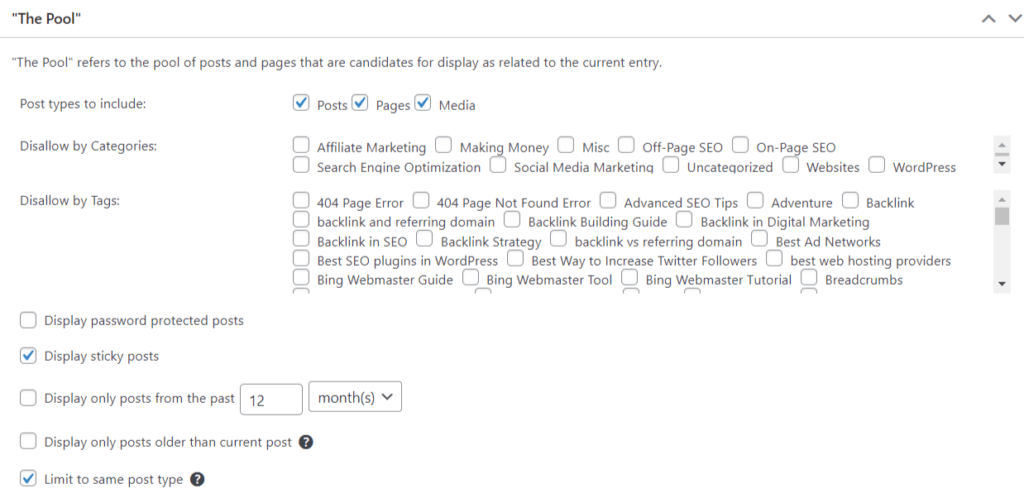
When you proceed further, you’ll see plenty of options to disallow content by categories and tags. Select the desired categories and tags here.
Now; simply scroll down and edit the algorithm settings. (refer below image)
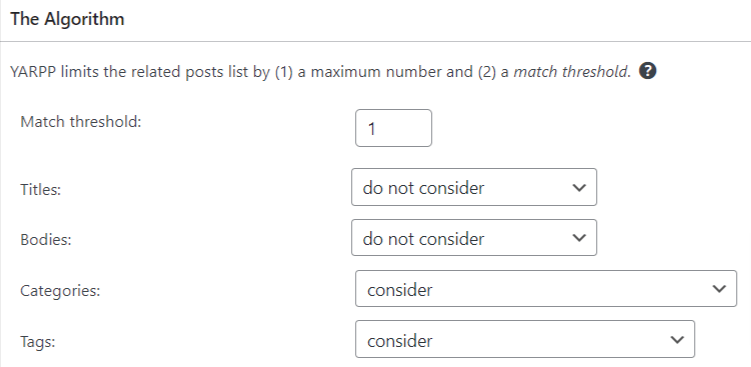
By changing the “Match threshold” number, you can set how strict the algorithm should be while choosing related posts.
By default, the “Match threshold” number will be set to 1, which means the algorithm will be less strict in finding related posts. If you want the algorithm to be more strict, then increase the number of “Match threshold”.
Also, there are some additional settings to consider for matching titles, bodies, categories and tags to find related posts.
When you scroll down, you will see the “Automatic Display Options” section to choose the display options for your related posts.
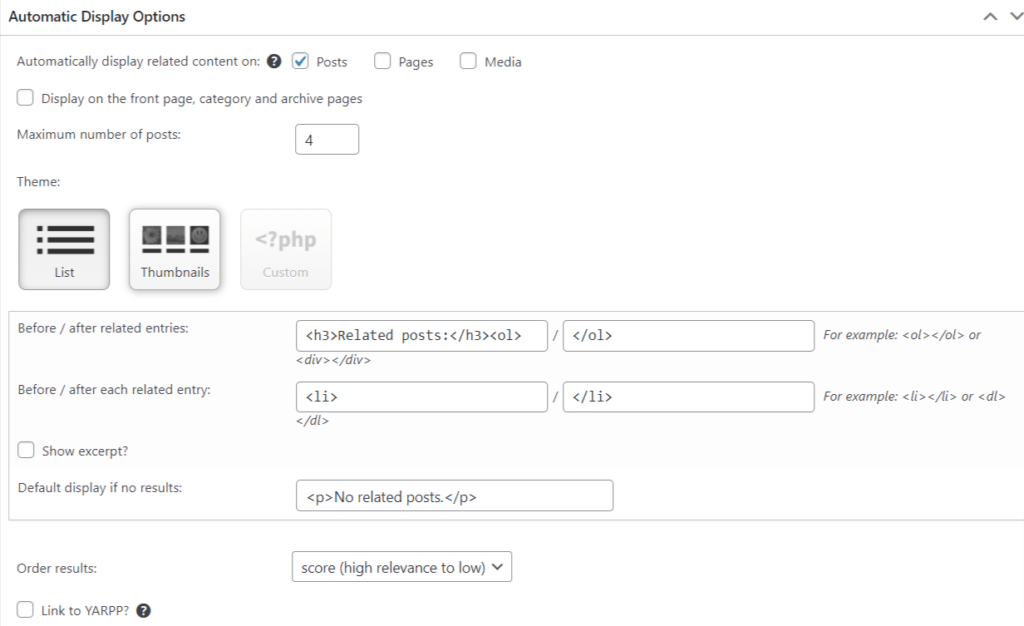
Here, you can choose where to automatically display related content and select the maximum number of posts to display in the related posts.
After customizing your display settings, you can scroll down to see a preview of how your related posts will appear.
The plugin offers three options — list, thumbnails and custom theme. Leave other setting as default.
Now, scroll down to the bottom and enable the “RSS Feeds Options” and “REST API Options”. Once you’ve made the changes, simply click the ‘Save Changes’ button. And; you’re all set!
Now; visit your website to see the related posts in action.
Take Away
After reading this article, you must come to know how to display related posts in WordPress. If you still have any question, you can ask in the comment box below.
If you liked this article, then do not forget to share it with others.